How to Use Canva for Digital Signage: The Ultimate Guide for 2026
In today’s fast-paced digital world, "freshness" is the currency of attention. If your digital signage content hasn't changed in a week, your customers have already stopped looking. But who has the time to design, download, and re-upload files every day?
At DigitalSigns.ai, we believe your workflow should be as creative as your designs. That’s why we’ve built a high-performance Canva integration within our core platform, DHub, that turns your design desk into a global broadcasting station in seconds.
Can Canva Publish Directly to Digital Signage?
The short answer is: No, Canva itself does not publish directly to hardware. While Canva is the world’s favorite design tool, it lacks the "brain" to manage hardware schedules, offline playback, and screen networks.
However, by using DHub, you bridge that gap. Our platform connects to your Canva account via an official API, allowing you to import, schedule, and sync designs directly to your screens without a single manual download.
The 6-Step "Design-to-Display" Workflow in DHub
Here is how you can transform your business communication using the DigitalSigns.ai + DHub power couple.
Step 1 — Connect Your Canva Account
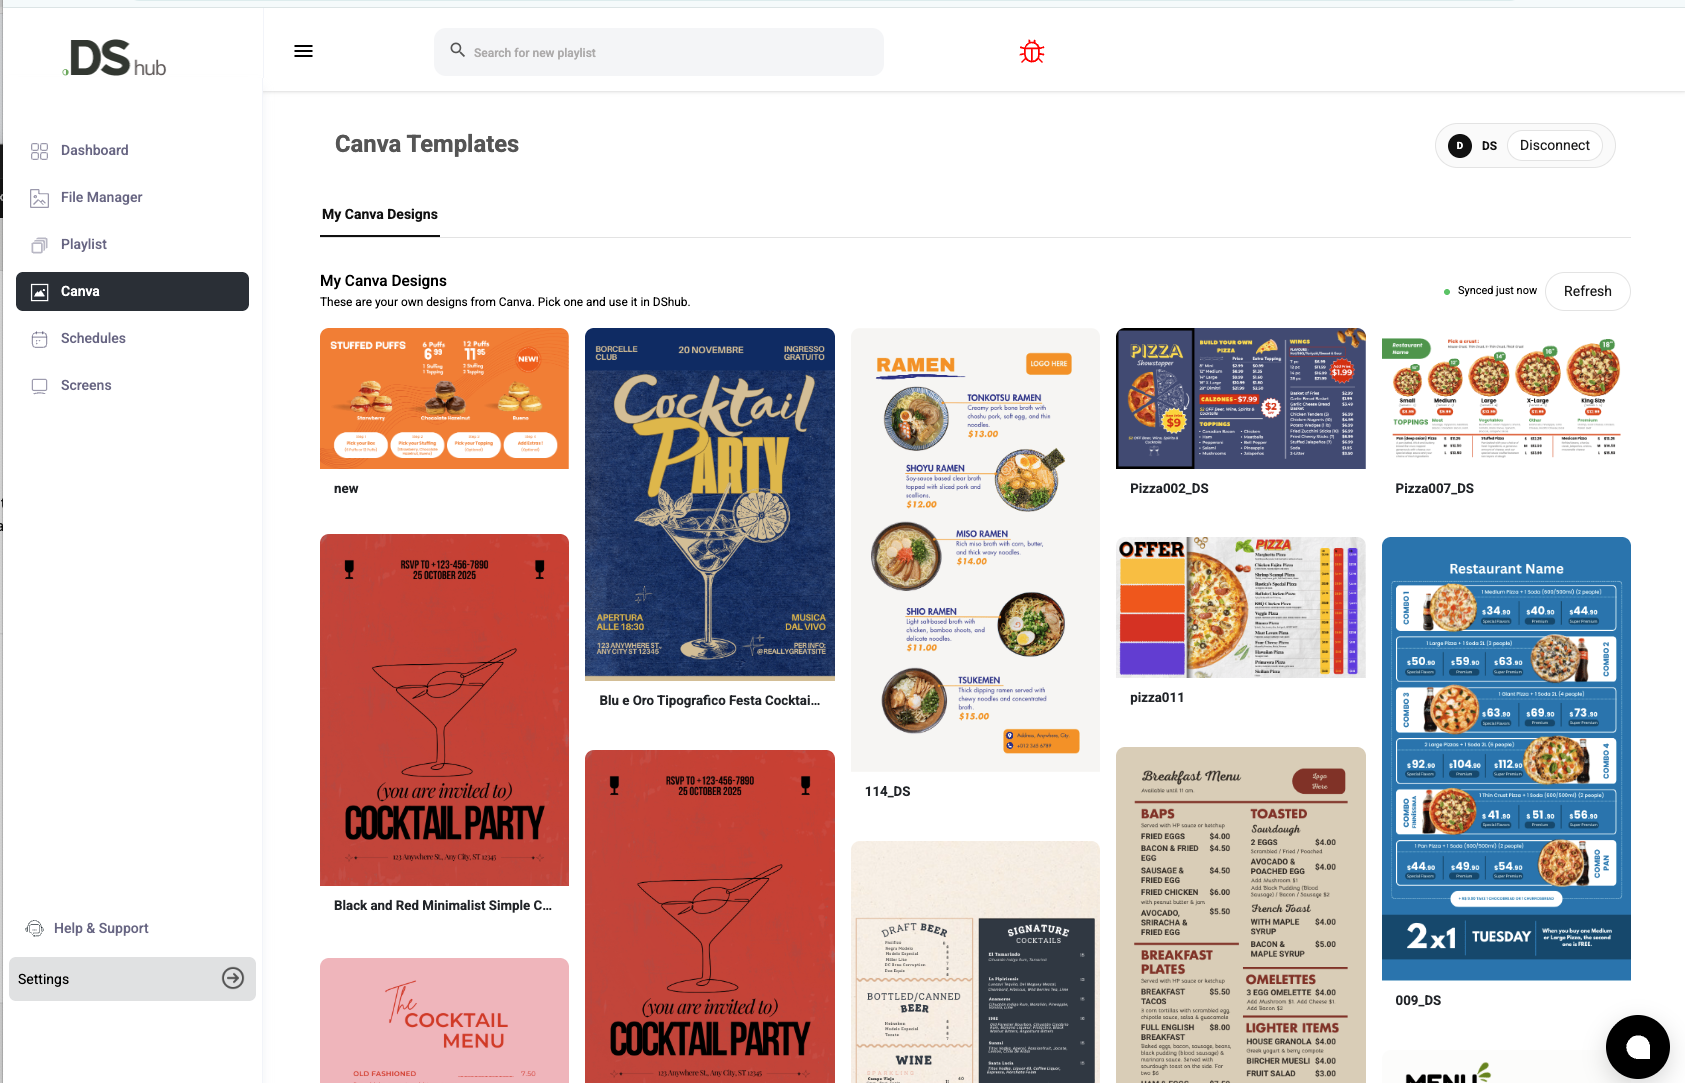
Inside the DHub dashboard, navigate to the integrations tab. With a few clicks, you can securely link your Canva workspace using the official API. Once authenticated, your entire design library—folders and all—is mirrored directly inside the Canva Templates section.
Step 2 — Browse Your Designs in DHub
Forget switching tabs. You can now browse your Canva folders and preview templates without leaving the DHub environment.
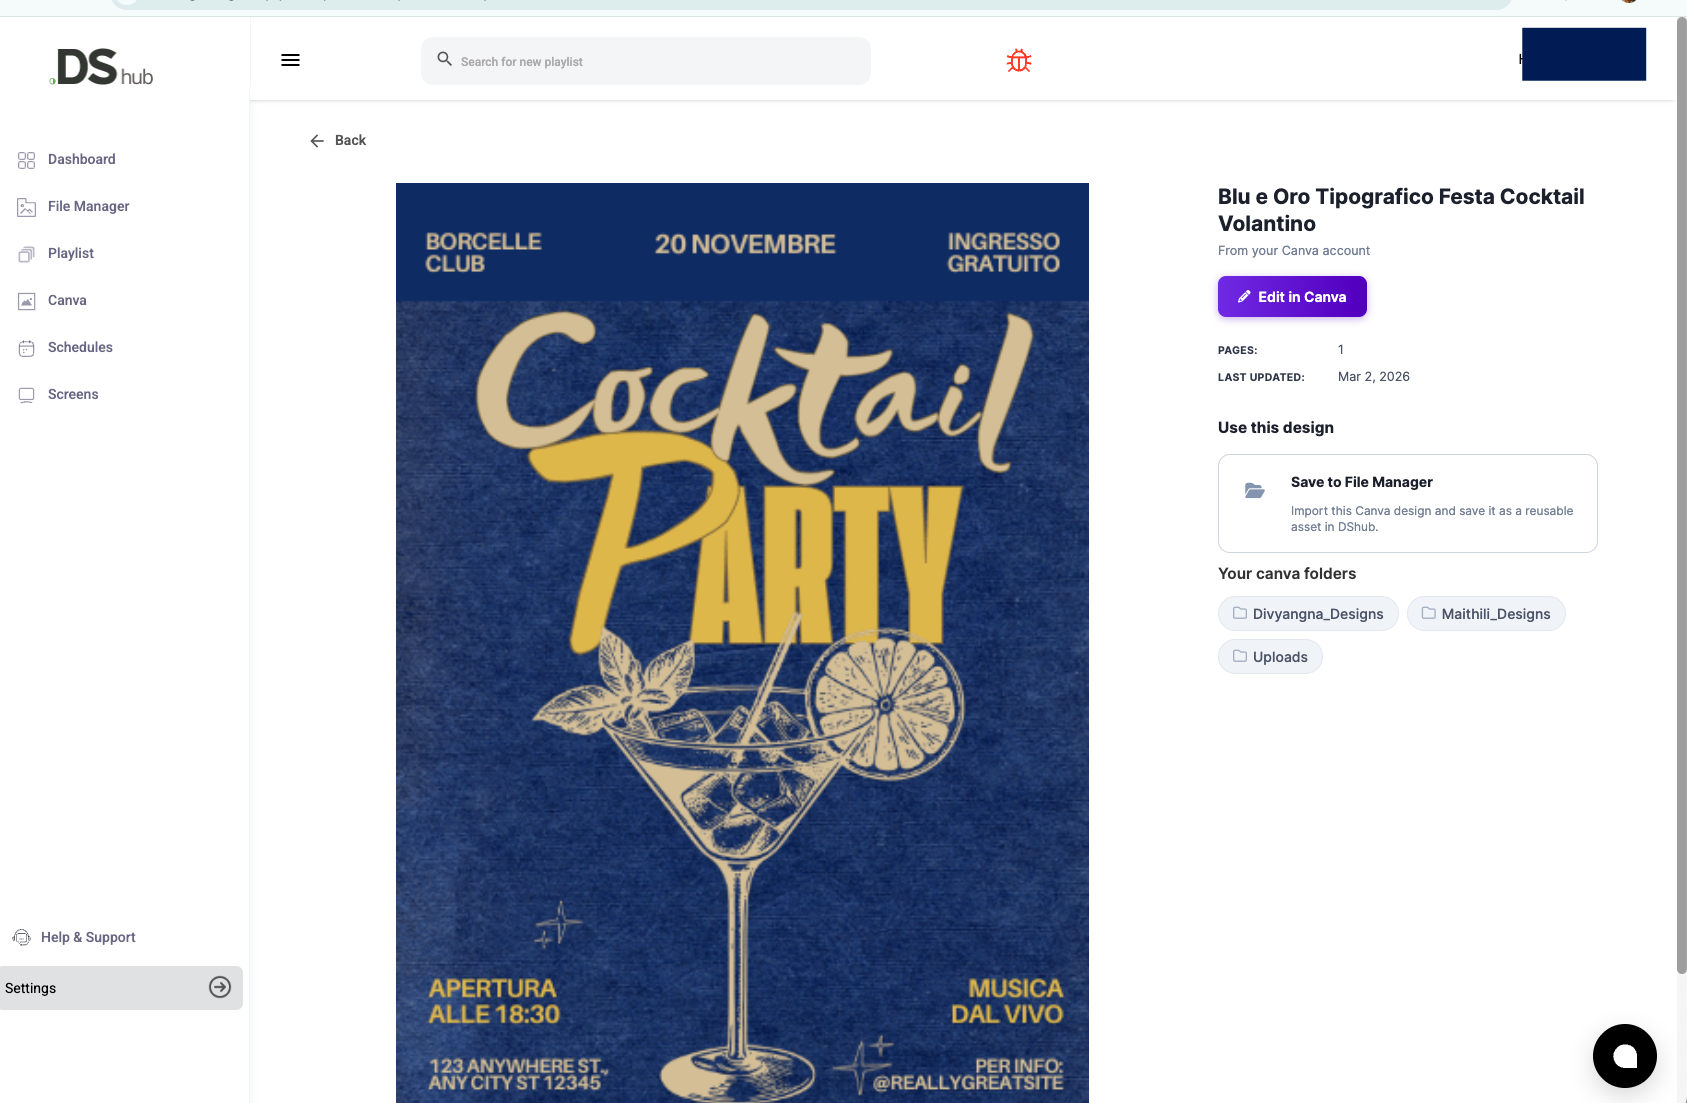
Step 3 — Deep-Dive into Design Details
Click on any design to see its metadata:
- Full Preview: See exactly how it will look on the big screen.
- Last Updated: Ensure you’re using the latest version.
- Page Count: Perfect for multi-page menu boards or rotating promotions.
Step 4 — One-Click "Edit in Canva"
Need to change a price or a date? Click "Edit in Canva" from within DHub. It opens your design instantly in the Canva editor. Once you hit save, the updated version is ready for re-import—no messy file naming like “Promo_Final_v2_REALLY_FINAL.png” required.
Step 5 — Import to the DHub Media Library
Click Save to File Manager to import the design into your DHub media library. The design is exported as a high-resolution image and stored as a reusable asset for:
- Screen Playlists
- Scheduled Content
- Digital Menu Boards
Step 6 — Publish to Any Screen
Add your design to a playlist and hit Publish. Whether you’re running Smart TVs, Amazon Signage Sticks, or Android Players, DigitalSigns.ai handles the rest. Your content will update across your entire network instantly.
Why DHub + Canva Works Best for Businesses
In 2026, AI-driven marketing and real-time updates are the standard. By combining Canva’s intuitive design with DHub’s robust management, you get:
- Zero Latency: Move from idea to screen in under 60 seconds.
- Cloud-First Resilience: Your screens keep running even if the internet wobbles, thanks to DHub’s local caching.
- Brand Consistency: Use your Canva Brand Kits to ensure every screen stays professional.
Common Use Cases:
- Restaurants: Update "Daily Specials" from your phone.
- Retail: Sync in-store screens with "Flash Sales" trending on social media.
- Corporate: Share internal updates or employee recognition instantly.
DigitalSigns.ai integrates directly with Canva, allowing users to import their Canva designs into DHub and publish them instantly to digital signage screens.
🚀 Ready to Automate Your Content?
Stop wasting time with USB sticks and manual uploads. Experience the seamless Canva → DHub workflow today.